Thermal Paste Laptop Replacement: When and How to Do It Properly
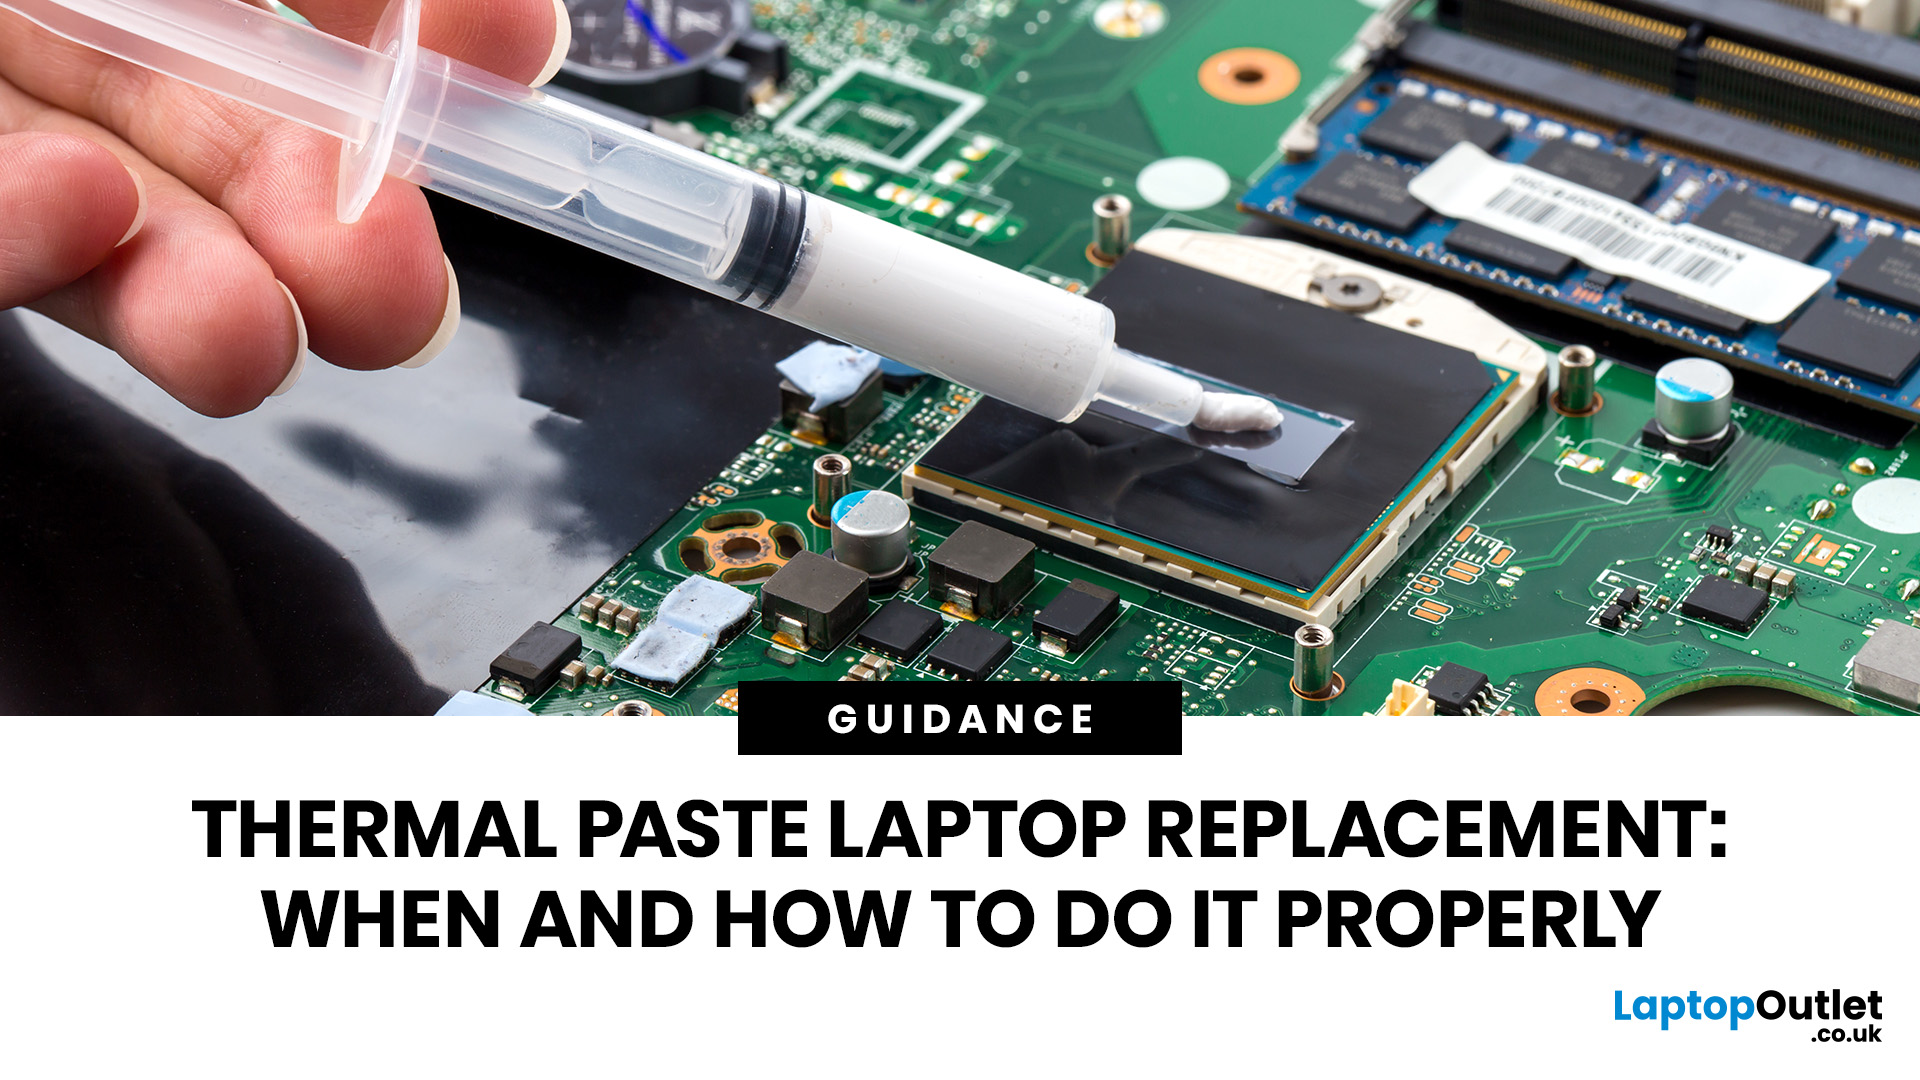
Thermal paste laptop replacement is needed when your laptop overheats, runs loud, slows down under load, or shuts down unexpectedly even after cleaning the fans and vents. Thermal paste helps transfer heat from the CPU or GPU to the heatsink, but it can dry out over time. Replacing it properly can improve cooling, reduce thermal throttling, and help your laptop perform more consistently.
A hot, loud, or slow laptop may be struggling with dust, poor airflow, heavy software, or ageing thermal paste. If temperatures stay high even after cleaning the vents, thermal paste laptop replacement can help restore cooling performance.
Thermal paste transfers heat from the CPU or GPU to the heatsink, but it can dry out or lose effectiveness over time. This guide explains when to replace it, how to apply it safely, how much to use, and when to get professional help.
What Is Thermal Paste in a Laptop?
Thermal paste, also called thermal grease, CPU paste, cooling paste, thermal compound, or thermal gel for processor surfaces, is a soft material applied between the processor and the heatsink.
The CPU and heatsink may look smooth, but they have tiny, microscopic gaps. Air trapped in those gaps does not transfer heat well. Thermal paste fills those small spaces and improves contact between the processor and the heatsink. This helps the heat move away from the chip and into the cooling system.
In a laptop, thermal paste is usually fou nd on:
- The CPU
- The dedicated GPU, if the laptop has one
- Sometimes other heat-producing chips, depending on the laptop design
Some laptops also use thermal pads on memory chips, VRMs, or other components. Thermal pads are not the same as thermal paste. If your laptop has thermal pads, do not replace them with paste unless the manufacturer’s service guide clearly says so.
Why Thermal Paste Laptop Replacement Matters
Laptop processors generate heat whenever they work. During browsing, video calls, gaming, coding, graphic design, rendering, streaming, or AI-related tasks, the CPU and GPU can heat up quickly. If they cooling system cannot move that heat away efficiently, the laptop may reduce performance to protect itself. This is called thermal throttling.
Replacing old thermal paste can help:
- Improve heat transfer between the CPU/GPU and heatsink
- Reduce high operating temperatures
- Lower fan noise in some cases
- Improve performance stability under load
- Reduce sudden shutdowns caused by overheating
- Extend the useful life of the cooling system
However, thermal paste is not magical. If the fan is clogged, the heatsink is damaged, the vents are blocked, or the laptop has a weak cooling design; new paste alone may not solve the problem. That is why diagnosis comes first.
Signs Your Laptop May Need Thermal Paste Replacement
You may need thermal paste laptop replacement if you notice several of these symptoms together:
1. Your Laptop Gets Hot Very Quickly
If the laptop becomes unusually hot within minutes of starting a normal task, the heat may not be moving efficiently from the processor to the heatsink.
2. The Fan Runs Loudly All the Time
A constantly loud fan can mean the cooling system is struggling. Dust is usually the first thing to check, but dried thermal paste can also be part of the problem.
3. Performance Drops After a Few Minutes
If games, editing software, or demanding apps run well first and then slow down, the laptop may be thermal throttling. The processor reduces speed when temperatures rise too high.
4. The Laptop Shuts Down Under Load
Sudden shutdowns during gaming, rendering, or multitasking can happen when temperatures reach unsafe levels.
5. Temperatures Stay High After Cleaning Dust
If you have cleaned the vents and fans, but temperatures are still high, old paste may be the next suspect.
6. The Laptop Is Several Years Old
Thermal paste can last for years, but laptops that run hot, travel often, or handle heavy workloads may need service earlier.
7. You Recently Removed the Heatsink
If you remove the heatsink for any reason, you should clean off the old paste and apply fresh paste before reassembling the laptop. Reusing disturbed thermal paste can create air gaps and poor contact.
Check These Things Before Replacing Thermal Paste
Before you open your laptop, make sure thermal paste is likely to be the problem. Many overheating issues have simpler causes.
Clean the Vents and Fans First
Dust blocks airflow. Use compressed air carefully or an electric duster to remove dust from the vents and fan area. Avoid spinning the fan too fast with compressed air because it can damage the fan's bearing.
Use the Laptop on a Hard Surface
Beds, blankets, carpets, and cushions block airflow. Test temperatures on a flat desk before assuming the laptop needs repasting.
Check Background Apps
A laptop can overheat if heavy apps are running in the background. Open Task Manager on Windows or Activity Monitor on macOS to see whether the CPU is under constant load.
Update BIOS, Drivers, and Power Settings
Some laptops improve fan curves, power behaviour, or thermal management through BIOS and driver updates.
Check Warranty Status
Opening a laptop may affect warranty coverage depending on the brand, region, and service policy. If your device is still under warranty, check the manufacturer’s support terms before repairing yourself.
Should You Replace Laptop Thermal Paste Yourself?
You can replace thermal paste yourself if you are comfortable opening electronics, keeping track of small screws, disconnecting fragile cables, and following a guide for your exact laptop model.
You should consider professional help if:
- Your laptop is under warranty
- You have never opened a laptop before
- The back cover is glued, clipped tightly, or difficult to remove
- The heatsink is hard to access
- Your laptop has liquid metal from the factory
- You see thermal pads and are unsure about their thickness
- You are uncomfortable disconnecting the battery
- The laptop is expensive or mission-critical for work
For beginners, the safest approach is to search for a service manual or model-specific teardown before starting. Different laptops have different screw lengths, connector layouts, heatsink designs, and thermal pad placements.
Tools You Need for Thermal Paste Laptop Replacement
Prepare everything before opening the laptop. You do not want to start the job and then realise you are missing a tool.
You will need:
- Precision screwdriver set
- Plastic pry tool or spudger
- High-quality thermal paste for CPU and GPU surfaces
- Isopropyl alcohol, preferably high concentration
- Lint-free cloth, coffee filter, or microfibre cloth
- Cotton swabs for careful cleaning
- Small tray or magnetic mat for screws
- Compressed air or electric duster
- Anti-static wrist strap, optional but useful
- Your laptop’s model-specific service guide, if available
Avoid using metal tools to pry open panels because they can scratch the casing or damage internal components.
Best Thermal Paste for Laptops: What to Look For
The best thermal paste for laptops is not always the most extreme paste on the market. Laptops are compact, hot, and harder to service than desktop PCs, so you want a paste that is safe, stable, and easy to apply.
Look for thermal paste that is:
- Non-conductive: safer if a small amount spreads near components
- Non-capacitive: reduces electrical risk
- Long-lasting: useful because laptops are not easy to open often
- Suitable for high temperatures: important for gaming and creative laptops
- Easy to clean and reapply: helpful for future maintenance
- Resistant to pump-out: useful in laptops because heatsinks and chips go through repeated heat cycles
For most users, a good-quality non-conductive thermal paste is the safest choice. Liquid metal can perform very well, but it is risky for beginners, can damage aluminium, may spill onto nearby components, and is not recommended unless the laptop was designed for it or you have advanced repair experience.
How Much Thermal Paste to Use on the CPU Surfaces
One of the most common questions is: how much thermal paste is to use on CPU areas inside a laptop?
The answer is: use a small amount, usually about the size of a grain of rice or a small pea for a typical CPU die or heat spreader. Laptop chips are often smaller than desktop CPU heat spreaders, so less is usually better.
Too little thermal paste may leave gaps. Too much thermal paste can spill over the edges, create a mess, and make future cleaning harder. Thermal paste should form a thin, even layer once the heatsink is tightened.
If the CPU and GPU are barely dying rather than covered with heat spreaders, many technicians prefer spreading a very thin layer carefully across the die to make sure the full surface is covered. If you are not sure, follow the guidance for your laptop model and paste type.
Best Way to Apply Thermal Paste
The best way to apply thermal paste depends on the size and shape of the chip.
Common methods include:
- Pea method: a small dot in the centre
- Rice grain method: a small line or dot for smaller laptop chips
- Thin spread method: a very thin manual layer across a bare die
For many laptop CPUs and GPUs, a small centre dot or thin spread works well. The goal is not to create a thick layer. The goal is to fill microscopic gaps between the chip and heatsink.
Avoid mixing old and new paste. Always clean the old paste first. If your laptop is still running hot after cleaning the vents, try to update drivers on Windows 10 or 11 before assuming the thermal paste is the only problem.
How to Replace Thermal Paste in Laptop: Step-by-Step Guide
This is a general guide. Your exact laptop may be different, so check out a model-specific teardown or service manual before starting.
Step 1: Shut Down and Unplug the Laptop
Turn the laptop off completely. Do not use sleep mode. Unplug the charger and remove any connected accessories.
Step 2: Let the Laptop Cool Down
Wait until the laptop is cool to the touch. Working on a hot heatsink or processor is uncomfortable and unsafe.
Step 3: Open the Bottom Cover
Place the laptop upside down on a clean, soft surface. Remove the screws from the back cover. Keep track of screw locations because some laptops use different screw lengths.
Use a plastic pry tool to release clips gently. Do not force the cover. If it does not lift, check for hidden screws under rubber feet or labels.
Step 4: Disconnect the Battery If Possible
Before touching internal components, disconnect the internal battery if the connector is accessible. This reduces the risk of short circuits while working.
Step 5: Locate the Cooling System
The cooling system usually includes one or more fans, heatpipes, and a metal heatsink plate over the CPU and GPU. The heatsink may have numbered screws showing the correct removal or tightening order.
Step 6: Remove the Fan or Heatsink Screws Carefully
Unscrew the heatsink gradually. If the screws are numbered, follow the reverse order for removal. Loosen each screw a little at a time instead of removing one screw completely before the others. This reduces uneven pressure on the chip.
If fan cables are connected, disconnect them carefully by the connector, not by pulling the wires.
Step 7: Lift the Heatsink Gently
The heatsink may feel stuck because old thermal paste can act like glue. Gently twist or wiggle the heatsink to release it. Do not pry hard against the motherboard.
Step 8: Inspect the Old Thermal Paste
Old paste may look dry, cracked, chalky, uneven, or hardened. This is a sign that the application of thermal paste is no longer doing its job properly.
Also check for dust, blocked fins, damaged fan blades, or loose thermal pads.
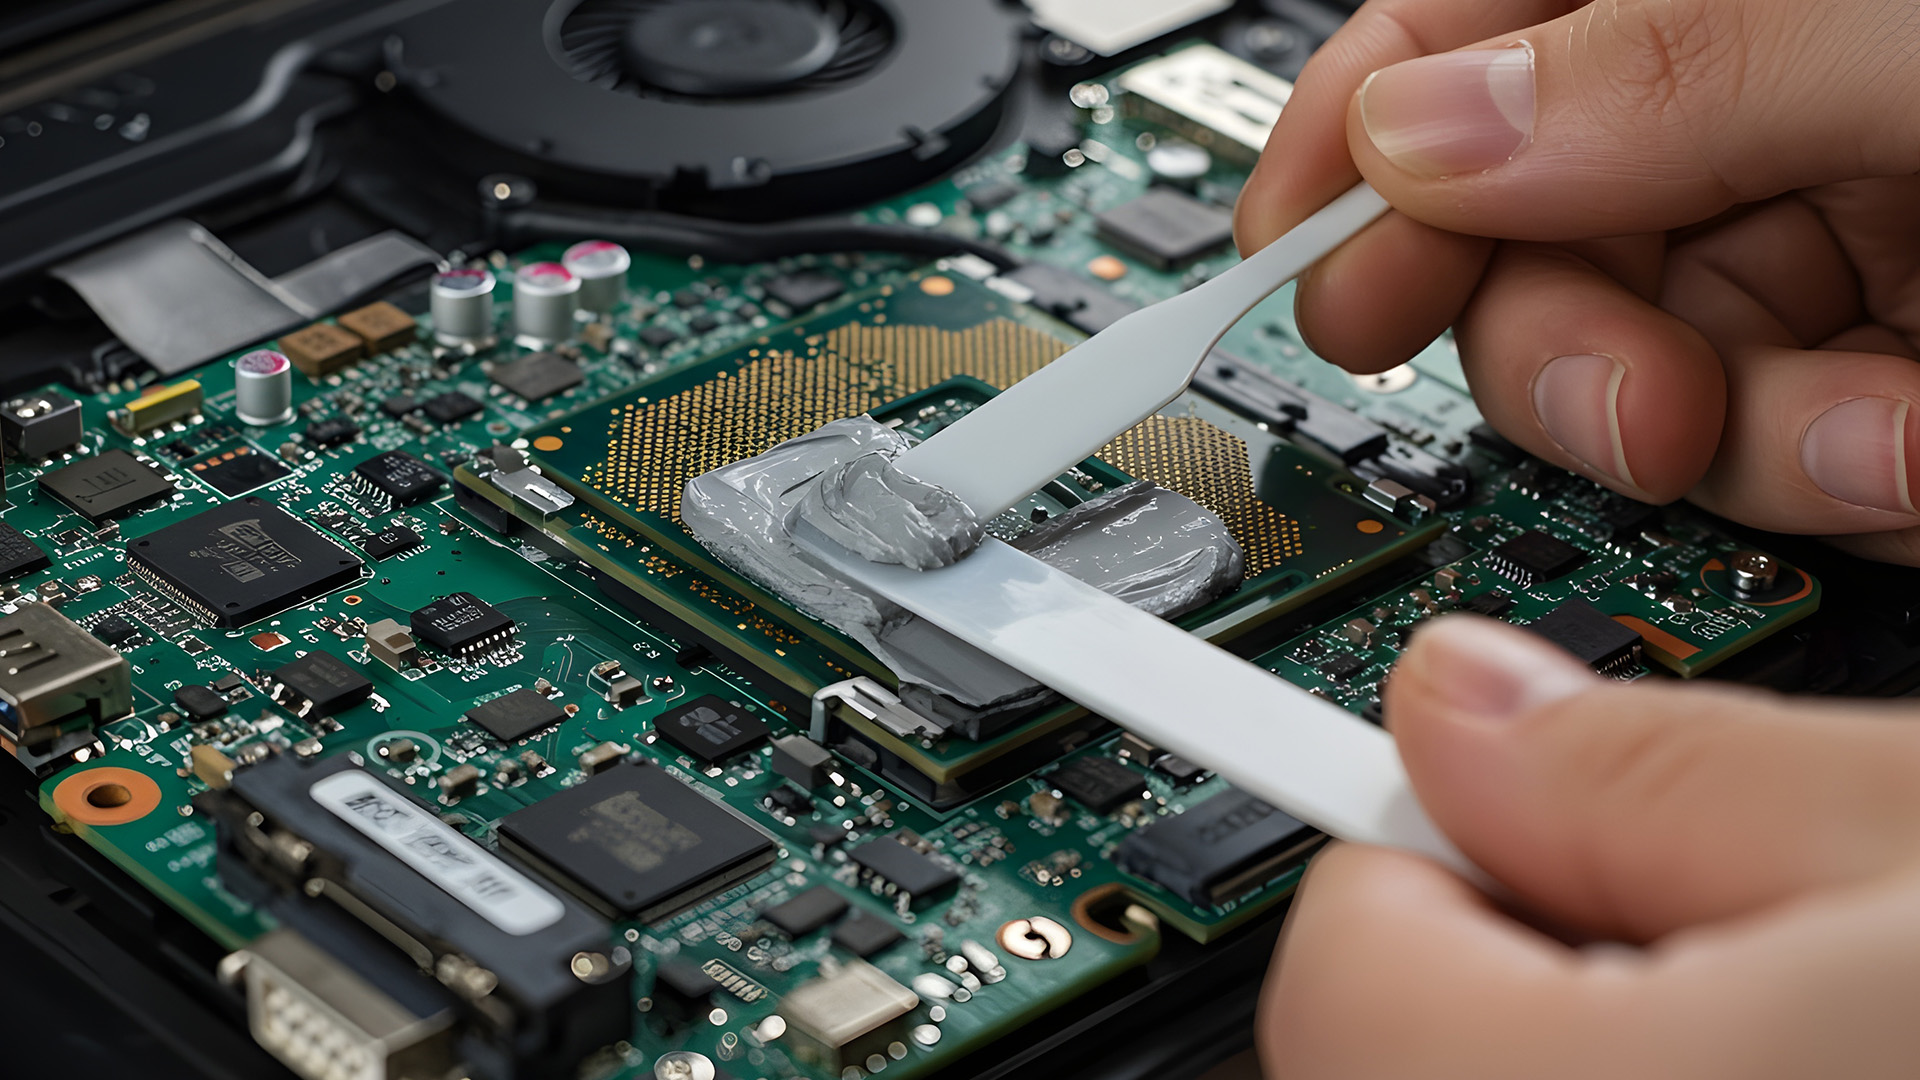
Step 9: Clean the Old Paste
Use isopropyl alcohol and a lint-free cloth to remove old paste from the CPU, GPU, and heatsink contact surfaces. Cotton swabs can help around the edges.
Be gentle. Do not scratch the chip or heatsink surface. Let the alcohol dry fully before applying new paste.
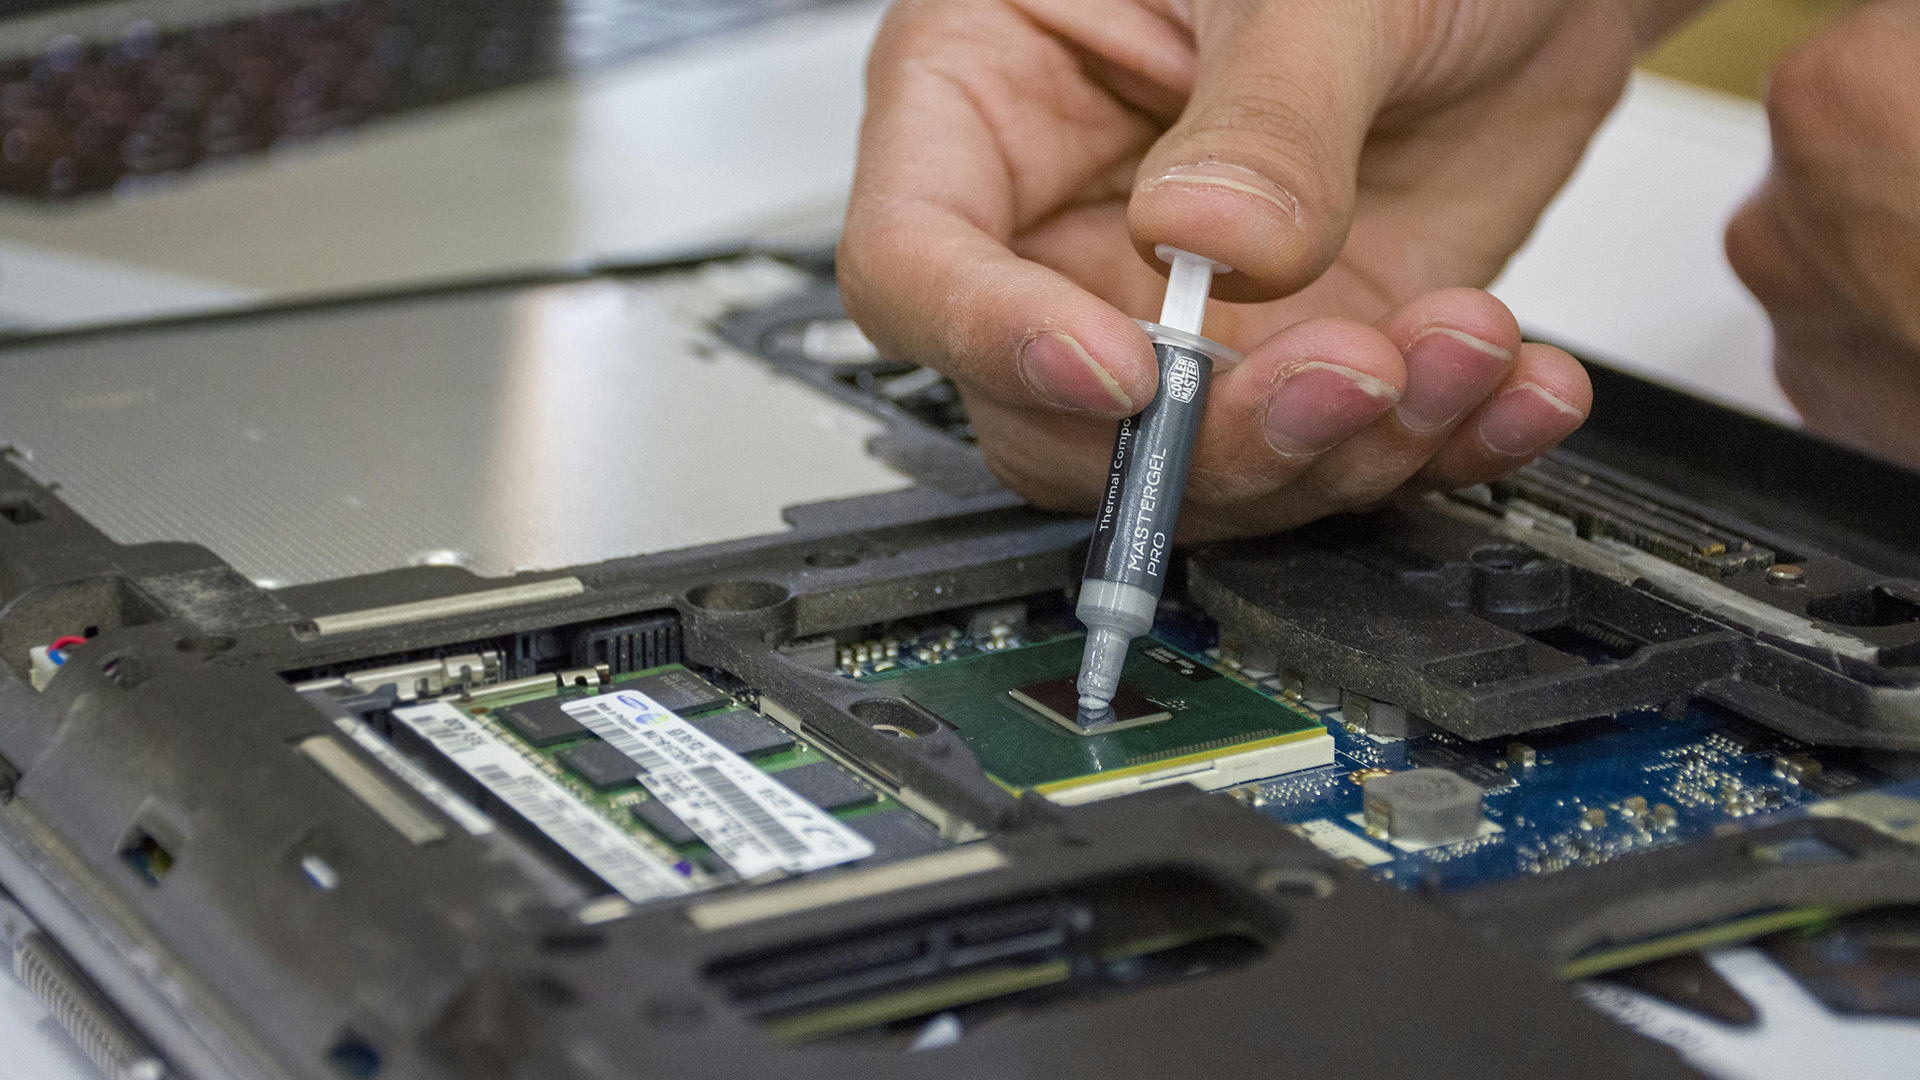
Step 10: Apply Fresh Thermal Paste
Apply a small amount of thermal paste on laptop CPU and GPU surfaces. For a small laptop chip, a rice-grain amount or small pea-sized dot is usually enough. For bare dies, use a thin, even spread if needed.
The best way to apply thermal paste is to use enough to cover the contact area once pressure is applied, but not so much that it spills heavily over the edges.
Step 11: Reinstall the Heatsink Evenly

Place the heatsink straight down onto the chip. Avoid sliding it around once it touches the paste.
Tighten the screws in the numbered order if shown. If there are no numbers, tighten gradually in a cross pattern. Do not overtighten. The goal is firm, even contact.
Step 12: Reconnect Cables and Battery
Reconnect the fan cable and internal battery. Make sure no cable is trapped under the cover.
Step 13: Reinstall the Bottom Cover
Clip the back panel into place and reinstall the screws. Use the correct screws in the correct locations.
Step 14: Test the Laptop
Turn the laptop on and listen for the fan. Check that the system boots normally. Then monitor temperatures at idle and under a normal workload.
What Temperatures Should You Expect After Repasting?
Results vary by laptop, paste quality, cooling design, room temperature, fan condition, and how badly the old paste had degraded.
A successful thermal paste laptop replacement may reduce temperatures, improve performance stability, or make the fan behave more normally. In some cases, the improvement is dramatic. In other cases, the change is smaller because dust, fan wear, or poor airflow is the main issue.
To judge results, compare:
- Idle temperature before and after
- Temperature during the same game or app
- Fan noise during the same workload
- Whether performance still drops under load
- Whether sudden shutdowns stop
Do not expect a laptop to become completely silent under heavy work. Gaming laptops, creative professional laptops, and compact ultrabooks can still run warm even when maintained properly.
Common Thermal Paste Mistakes to Avoid
Using Too Much Paste
More paste does not mean better cooling. A thick layer can reduce contact quality and spill onto nearby components.
Using Too Little Paste
Too little paste may fail to cover the contact area properly, especially on bare dies.
Reusing Old Paste
Once you remove the heatsink, clean and reapply. Reusing disturbed paste can trap air and reduce heat transfer.
Forgetting to Clean the Heatsink
Cleaning only the CPU is not enough. Old paste also sticks to the heatsink contact plate.
Damaging Thermal Pads
Many laptops use thermal pads around the CPU or GPU area. If they tear or shift, components may not cool correctly. Replace pads with the same thickness if needed.
Using Liquid Metal Without Experience
Liquid metal is conductive and risky. It can damage components if spilled and can react with some metals. Beginners should use a safer non-conductive paste.
Ignoring Fan Dust
Fresh thermal paste will not help much if air cannot pass through the heatsink fins.
Not Checking the Laptop Model First
Some laptops are easy to open. Others are complex. Always check your model before starting.
Thermal Paste vs Thermal Pads: Do Not Confuse Them
Thermal paste is used for direct contact between a chip and a heatsink. Thermal pads are thicker and used where there is a larger gap between components and the cooling plate.
Do not replace a thermal pad with thermal paste unless a service manual specifically instructs you to do so. Paste cannot bridge large gaps like a pad can. If a pad is damaged, replace it with the same thickness and suitable thermal rating.
Before opening your laptop or making hardware changes, it is always smart to back up important files, and if anything goes missing, you can follow a deleted files recovery guide to restore lost data.
How Often Should You Replace Thermal Paste in a Laptop?
There is no single schedule for every laptop. A general rule is to consider replacement every few years, especially if temperatures rise and cleaning dust does not help.
You may need to replace it sooner if:
- You use the laptop for gaming or rendering
- The laptop runs hot most days
- You live in a dusty or warm environment
- The laptop is often transported
- The heatsink was removed during another repair
You may not need to replace it if:
- Temperatures are normal
- Fan noise is normal
- Performance is stable
- The laptop is new or under warranty
- Dust cleaning solves the issue
The best schedule is symptom-based: replace thermal paste when there is evidence that cooling performance has declined.
Can Thermal Paste Improve Laptop Performance?
Yes, but only when heat is limiting performance. Thermal paste does not make the CPU or GPU more powerful. It helps the cooling system transfer heat more efficiently. If the laptop was throttling because of poor heat transfer, fresh paste may help the processor maintain higher speeds for longer.
This can be especially useful for:
- Gaming laptops
- Creative laptops used for editing or rendering
- Student laptops that are older and running hot
- Business laptops used for long video calls
- AI laptops and performance laptops running demanding workloads
If your device is outdated, damaged, or no longer meeting your needs, maintenance may not be enough. In that case, it may be worth exploring a newer model from a reliable top laptop collection.
When Thermal Paste Replacement Will Not Fix the Problem
Replacing thermal paste may not solve overheating if:
- The fan is broken
- The heatsink is clogged with dust
- The vents are blocked
- The heatpipe is damaged
- The laptop is running malware or heavy background apps
- The charger or battery is faulty
- The laptop’s cooling design is weak for the workload
- Thermal pads are missing or the wrong thickness
- The room temperature is very high
If temperatures stay high after repasting, check fan operation, heatsink contact, BIOS settings, background apps, and airflow. If the laptop still overheats, a technician may need to inspect it.
DIY vs Professional Thermal Paste Replacement
DIY Replacement Is Best If:
- You have experience opening laptops
- You have the right tools
- You can find a model-specific guide
- The laptop is out of warranty
- You are comfortable handling small parts
Professional Replacement Is Best If:
- The laptop is expensive
- You cannot find a reliable guide
- The cooling system is difficult to access
- The laptop uses liquid metal
- You need guaranteed service
- You are worried about damaging the laptop
A repair shop can also check the fan, heatsink, vents, and thermal pads at the same time.
Laptop Buying and Upgrade Considerations
Sometimes thermal paste replacement is the right maintenance step. Other times, overheating is a sign that the laptop is no longer suited to your workload.
For example, if you are gaming on a thin office laptop, editing 4K video on an entry-level machine, or using demanding AI tools on older hardware, repasting may help temperatures but not fully solve performance limits.
If you decide it is time to upgrade, you can compare the latest laptops and notebooks in a top laptop collection. Students may prefer best budget laptops for students, while designers and video editors should look at creative professional laptops. Gamers should compare top laptops for gaming with strong cooling systems, and business users may prefer affordable Dell laptops. If you are interested in macOS, explore the best Apple laptops, and if you want next-generation features, compare smart laptops with AI performance. You can also improve your setup with the best accessories for laptops, such as cooling stands, external keyboards, laptop bags, and docking stations.
Quick Checklist Before You Start
Use this checklist before applying thermal paste to CPU or GPU surfaces inside your laptop:
- Back up important files
- Check warranty status
- Find your laptop model guide
- Prepare the correct screwdriver
- Get non-conductive thermal paste
- Prepare isopropyl alcohol and lint-free cloth
- Shut down and unplug the laptop
- Let the laptop cool
- Disconnect the battery if possible
- Clean the old paste fully
- Use the correct amount of paste
- Reinstall the heatsink evenly
- Confirm the fan cable is connected
- Test temperatures after reassembly

Final Thoughts
Thermal paste laptop replacement can be a smart maintenance step when your laptop is overheating, throttling, or running louder than usual. The key is to diagnose the issue first. Clean the fans and vents, check background apps, confirm temperatures, and only repaste when there is a clear reason.
If you decide to do it yourself, use the right tools, choose safe thermal paste, clean the old paste properly, apply the correct amount, and reinstall the heatsink evenly. If the laptop is under warranty, difficult to open, or too valuable to risk, professional service is the safer option.
A well-done thermal paste replacement will not turn an old laptop into a new one, but it can restore lost cooling efficiency, reduce overheating, and help your laptop perform more consistently.

FAQs About Thermal Paste Laptop Replacement
What is thermal paste on a laptop?
Thermal paste on a laptop is a heat-transfer compound placed between the CPU or GPU and the heatsink. It fills tiny air gaps and helps move heat away from the chip.
How do I know if my laptop thermal paste is bad?
Common signs include high temperatures, loud fans, performance drops, overheating shutdowns, and poor cooling even after dust cleaning. The paste may also look dry, cracked, or hardened when the heatsink is removed.
How to replace thermal paste in a laptop safely?
Turn off and unplug the laptop, disconnect the battery, if possible, remove the heatsink, clean old paste with isopropyl alcohol, apply a small amount of fresh paste, reinstall the heatsink evenly, and test temperatures after reassembly.
What is the best thermal paste for laptops?
The best thermal paste for laptops is usually a high-quality, non-conductive, long-lasting paste that is easy to apply and safe around compact laptop components. Avoid liquid metal unless you have advanced experience, or the laptop is designed for it.
How much cooling paste on CPU surfaces is enough?
For most laptop CPUs, a rice-grain-sized or small pea-sized amount is enough. The paste should spread into a thin layer when the heatsink is tightened.
How much thermal grease on the CPU is too much?
If paste squeezes heavily over the edges, you probably used too much. A small amount is enough to fill microscopic gaps. Too much paste can create a mess and reduce efficiency.
What is the best way to apply thermal paste?
For many CPUs, a small dot in the centre works well. For bare laptop dies, a very thin spread can help ensure full coverage. Always clean old paste first.
Can I use thermal gel for processor cooling?
Many people use terms like thermal gel for the processors, thermal grease, and thermal paste to describe similar cooling compounds. Make sure the product is designed for CPU or GPU cooling and is safe for laptop use.
Do I need to apply thermal paste to CPU and GPU both?
If your laptop has both a CPU and a dedicated GPU under the same heatsink, you usually need to clean and repaste both surfaces when the heatsink is removed.
Can I replace thermal paste without cleaning the old paste?
No. You should always clean old paste before applying new paste. Mixing old and new paste can create uneven contact and reduce cooling performance.
How often should laptop thermal paste be replaced?
Many laptops do not need repasting on a fixed schedule. Consider it every few years or when temperatures rise, fan noise increases, or performance drops after dust cleaning.
Will replacing thermal paste void my warranty?
It depends on the manufacturer, model, region, and warranty terms. Always check support terms before opening a laptop that is still under warranty.
| Read More |
| How to Recover Deleted Files and Data: Step-by-Step Guide |
| How to Update Drivers on Windows 10 & 11 (Complete Guide) |
| Why Your Laptop Is Overheating (How to Fix it Fast) |
Related Articles

Last Updated: May 01, 2026
For most developers, the best machine is not necessarily the most expensive one. It is the one that keeps up with your workflow, feels comfortable to use for hours at a time, and still makes sense a few years down the line.
That matters even more in 2026. Modern development work is heavier than it used to be. A typical day might include an IDE, a browser with far too many tabs open, Docker, a local database, Slack, video calls, design files, and maybe a virtual machine or AI-assisted tools running in the background. A laptop that feels fine on paper can start to struggle surprisingly quickly once real work begins.
This guide is designed for a UK audience looking for a dependable laptop for software development, whether you are a student, a junior developer, a freelancer, or a full-time engineer replacing an ageing machine. Given below are top 10 laptops for programming and coding 2026:
1. ASUS Zenbook 14
Technical Specs:
- Intel Core Ultra 5 225H 14-Core Processor
- AI Ready Laptop
Last Updated: May 01, 2026
Upgrading laptop RAM is one of the simplest ways to make an older machine feel faster and more capable again, but only if the compatibility side is right from the start. That is the part many quick guides skip. Before buying anything, we always recommend checking whether the laptop has upgradeable memory, what RAM standard it uses, how much it supports, and whether upgrading means adding another module or replacing the existing setup.
For UK shoppers, that matters because a RAM upgrade can be a much smarter option than replacing a laptop too early. If a system slows down with lots of browser tabs, Office apps, study tools, or light creative work, upgrading the RAM can improve day-to-day responsiveness at a much lower cost than buying a new machine. If the laptop is already maxed out, has soldered memory, or is really held back by old storage, the better move may be to consider an SSD upgrade or a newer device.
Why Upgrade Laptop RAM in the First Place?
RAM is the short-term memory your

Last Updated: May 01, 2026
Video editing has become one of the most demanding everyday laptop workloads. Even relatively simple projects can involve high-resolution footage, multiple layers, colour work, motion graphics, audio cleanup, and export-heavy timelines. That means the best laptop for video editing is not just the one with the biggest headline spec. It is the one that fits the kind of editing you do, whether that is short-form social content, YouTube videos, client work, documentary edits, or more advanced professional production.
This guide includes mainstream creator laptops, premium ASUS ProArt models, mobile workstations, and a few higher-powered gaming machines that are relevant because video editing often benefits from the same strengths: strong sustained performance, capable graphics, fast storage, and displays built for visual work.
What Makes a Good Video Editing Laptop in 2026?
A good video editing laptop needs to do three things well:
- Handle demanding timelines smoothly,
- Stay responsive under
Last Updated: May 01, 2026
The computer that helped guide the Apollo missions worked with just 4 KB of RAM and around 72 KB of stored memory. Today, a modern laptop can burn through more than that just opening a few tabs.
That is how fast tech has moved and why an older laptop can suddenly feel frustratingly slow. Long boot times, laggy apps, and constant low-storage warnings can make even simple tasks feel harder than they should.
The good news is that you do not always need a brand-new machine. In many cases, upgrading your SSD is one of the easiest ways to make your laptop feel faster, smoother, and far more usable.
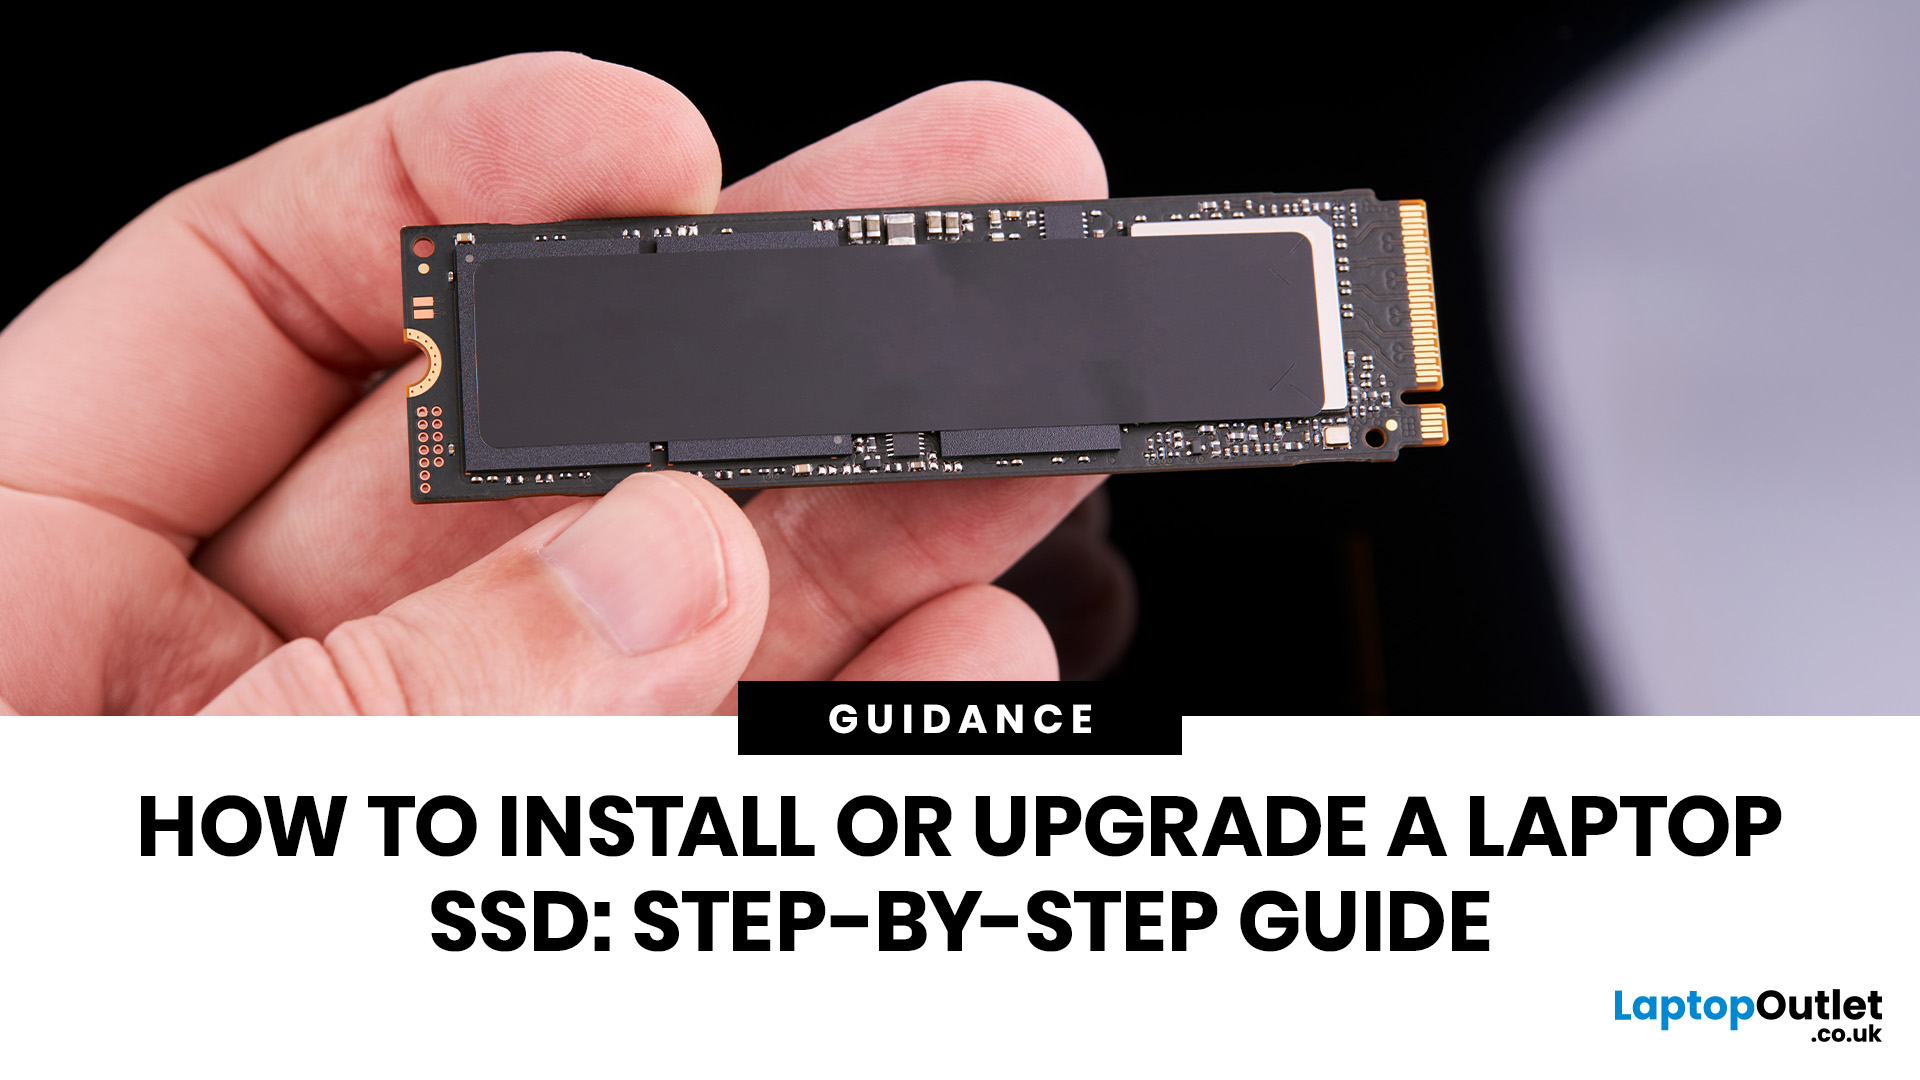
In this guide, we will show you how to upgrade a laptop SSD step by step, from checking compatibility to choosing the right drive and installing it properly.
Why upgrading your laptop SSD is worth it
Faster boot times, file transfers, and app loading
A slow laptop gets old fast. Long startup times, laggy apps, and endless waiting usually point to one thing: slow storage.
That is why how to upgrade
Last Updated: June 18, 2026
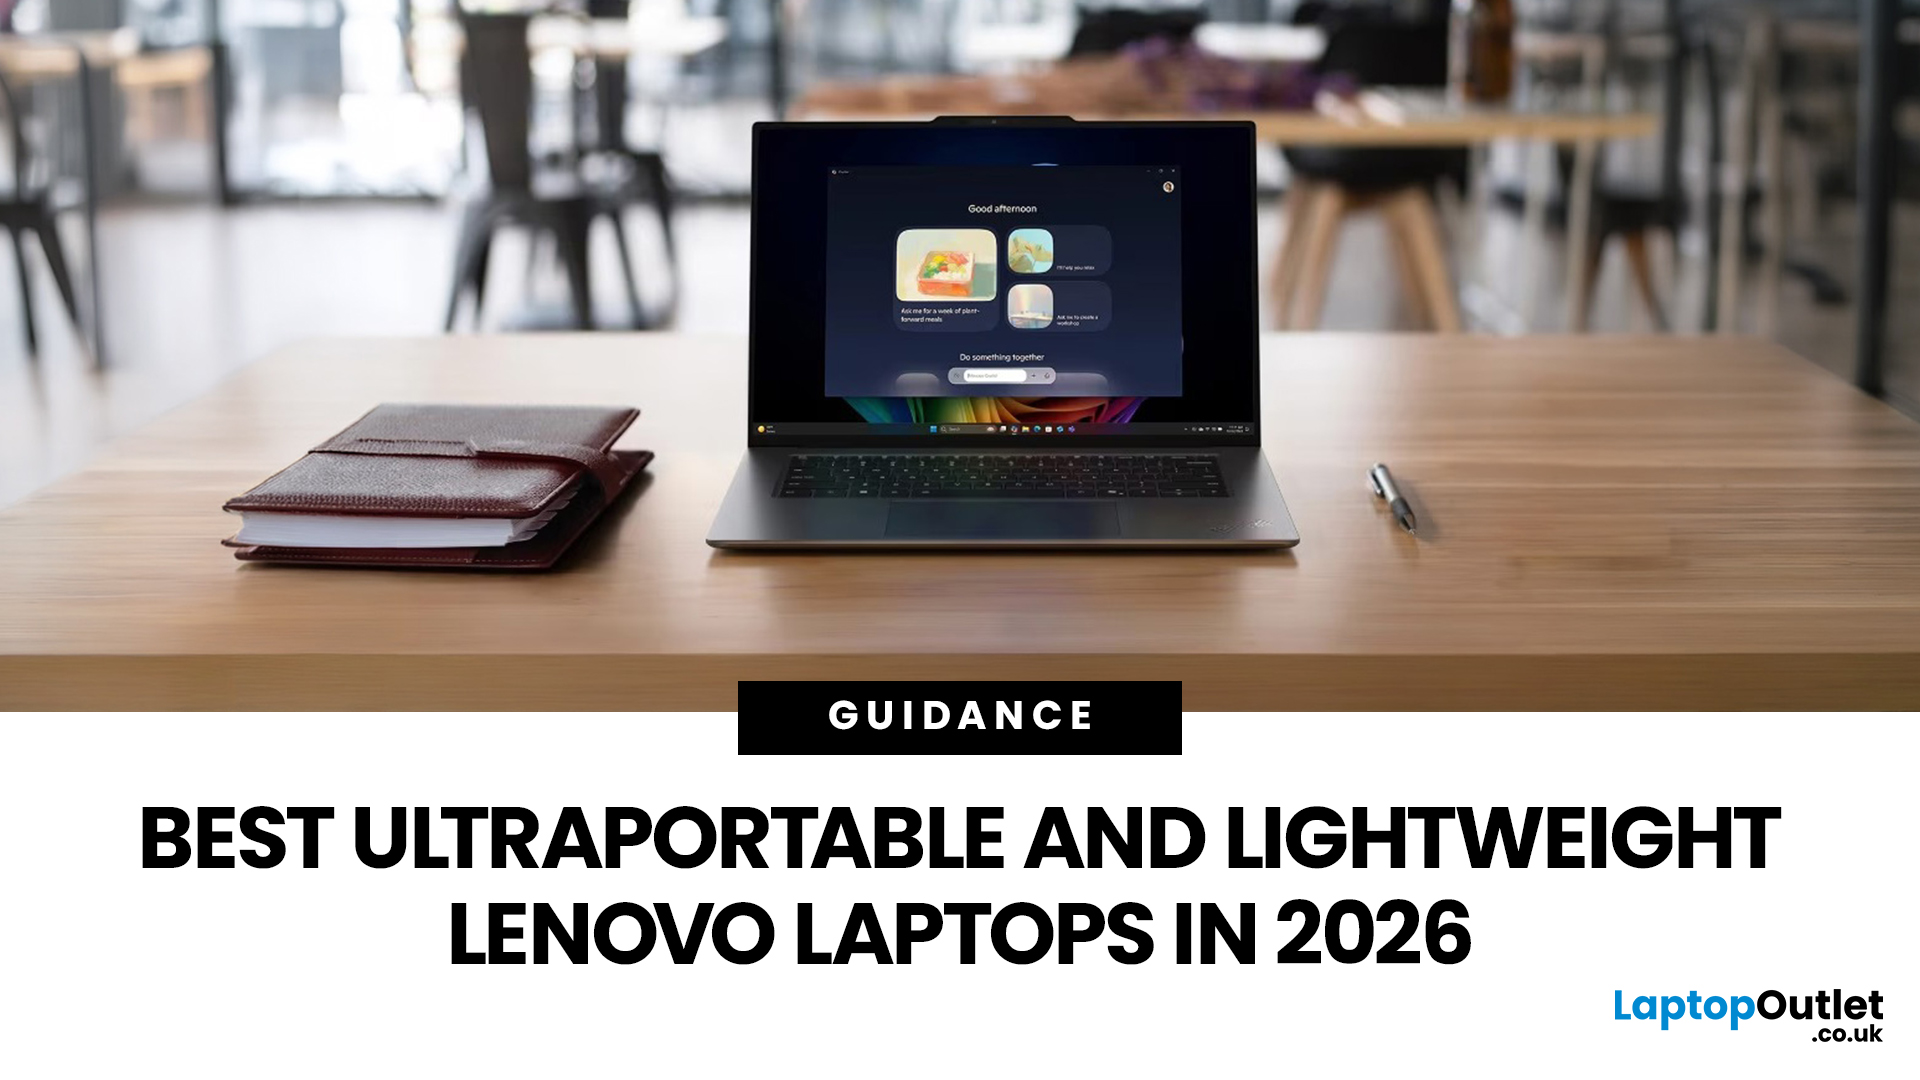
The best lightweight Lenovo laptops in 2026 are not all trying to do the same job. If we want the lightest premium 14-inch option, Lenovo’s Yoga Slim 7i Ultra Gen 11 Aura Edition stands out at 975g with a 75Wh battery. If business travel comes first, the ThinkPad X1 Carbon Gen 13 Aura Edition is still one of the strongest all-round choices thanks to its sub-1kg starting weight on some configs, proper business-grade connectivity, and classic ThinkPad focus.
That matters because buyers looking for ultraportable Lenovo laptops usually care about more than one thing at once: low carry weight, reliable battery life, enough ports to avoid living off dongles, and a screen that still feels good after a full day of work, study or travel. In this guide, we break down the best current Lenovo options for commuters, students, professionals, creators and home users, using Lenovo’s own 2026-era spec sheets first and independent reviews where they add useful trade-offs.
What Counts as a Genuinely Lightweight

Last Updated: April 29, 2026
If you want to spend less on a laptop in 2026, the smartest move is to make better buying decisions from the start. That means:
- Buy the right type of laptop for the way you actually use it
- Compare new and refurbished properly
- Avoid machines that look cheap but cost you more later through poor performance, weak battery life, or missing warranty cover.
In the UK, refurbished options can save you a lot when you buy from a reputable retailer, but you still need to check condition grading, warranty, return options, and whether the laptop is genuinely suitable for today’s Windows requirements.
That is the real cheapest way for UK shoppers to buy a laptop they can feel good about. A low headline price only counts as a good deal on laptops if the machine still fits your workload, stays supported, and does not force you into another purchase too soon. This laptop deals & savings guide helps you work that out clearly, without making the process feel more complicated than it needs to be.
Quick Money-Saving

Last Updated: May 01, 2026
Looking to sell or trade in old laptop in the UK and get the most cash for it? This guide covers everything you need to know, from checking your laptop's resale value and wiping your data safely, to choosing the right selling method and avoiding common scams. Follow these steps and you could put a healthy amount back in your pocket.
What Does "Selling vs Trading In" Actually Mean?
Before diving in, it's worth being clear about the difference. Selling your old laptop means listing it yourself and receiving payment from a buyer. Trading in means handing your device to a scheme or retailer in exchange for cash, credit, or a discount off your next purchase.
Both have real merit, and the right option depends on how much time you have, how much you want to earn, and what condition your laptop is in.
How Much Is Your Old Laptop Actually Worth?
The first question most people ask, “how much is my laptop.” The honest answer is: it depends on several factors, but there are reliable ways to estimate

Last Updated: May 01, 2026
If you are searching for teacher discount laptops UK, the good news is that there are several ways to cut the cost of a new device without compromising on performance. In the UK, teachers, lecturers, and some school staff can often access education pricing, retailer offers, refurbished savings, and category-specific deals designed for work and study. Apple’s UK education pricing is available to students, teachers and staff, while Lenovo UK also includes teachers in its education discount programme.
The key is knowing where teachers get discounts on laptops in the UK, what proof you need, and which laptop category makes the most sense for your day-to-day workload. Whether you need a lightweight machine for lesson planning, a durable device for classroom use, or a more powerful system for admin-heavy tasks, there are smart ways to save.
In this step-by-step guide, we’ll show you how to access laptop discounts for teachers in the UK, what the verification process typically looks like, and
Last Updated: May 22, 2026
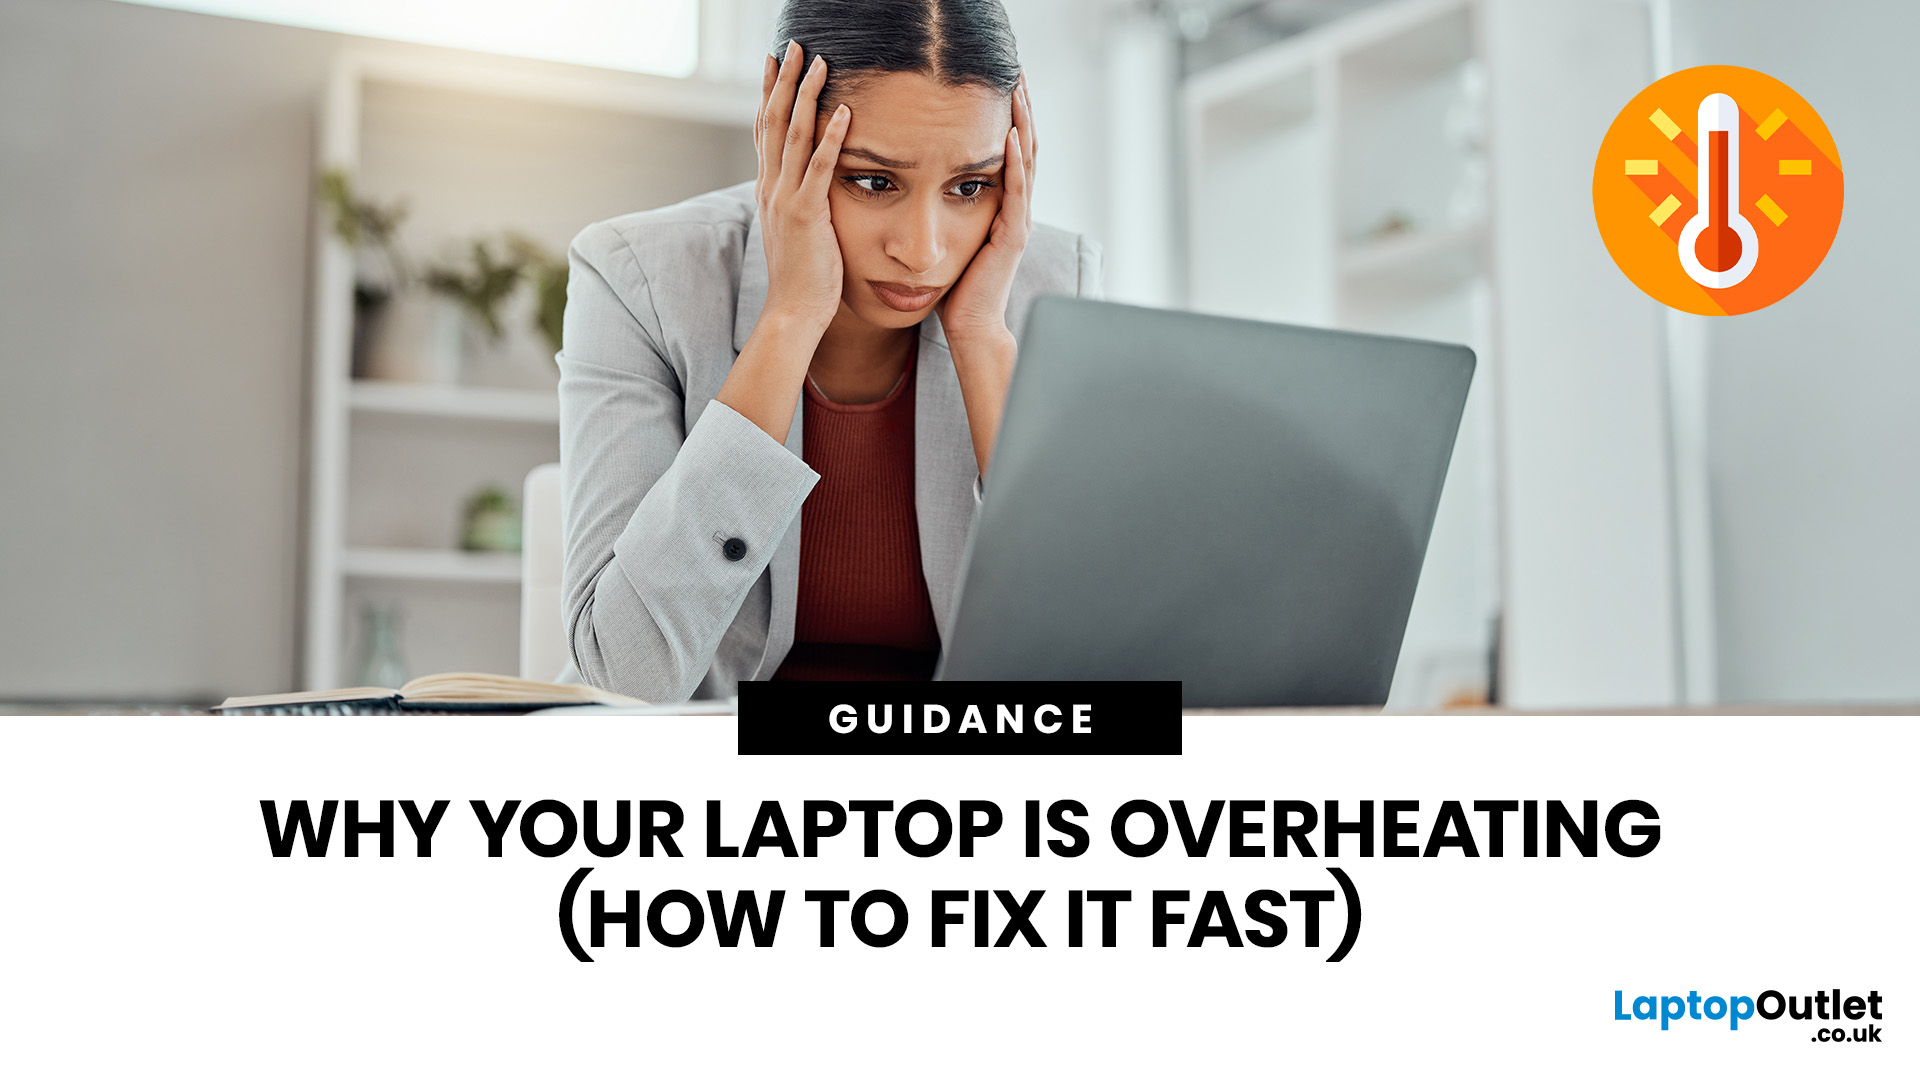
A laptop usually overheats because of blocked airflow, dust, heavy apps, dried thermal paste, charging heat, or a faulty fan. To cool it down fast, place it on a hard surface, close demanding programs, clean the vents, switch to Balanced mode, and let it rest. If it keeps overheating or shutting down, it may need internal cleaning, thermal paste replacement, or repair.
Your coffee could be hot, but it doesn't work for a laptop to be honest. A little warmth is normal during gaming, charging, video calls, or heavy work, but if your laptop is overheating, slowing down, shutting off, or making loud fan noise, something needs fixing. This guide explains the fastest laptop overheating fix, why your laptop is running hot, and how to cool it down before the problem gets worse.
First, Is Your Laptop Actually Overheating?
Before you panic, it is important to know the difference between a laptop that is simply warm and a laptop that is truly overheating.
Laptops are compact machines. The processor,

Last Updated: May 22, 2026
Laptop screen repair cost in the UK usually ranges from £50 to £300 for a standard 15.6-inch screen, depending on the laptop model, screen type, damage level, and labour cost. Basic LCD replacements are usually cheaper, while touchscreen, OLED, gaming laptop, and MacBook screen repairs can cost more. If your laptop is still fast and the repair costs less than half its value, fixing the screen is usually worth it. If the laptop is old, slow, or the repair is close to the price of a replacement, upgrading may be the smarter choice.
So, your laptop screen has cracked, flickered, gone black, or started showing strange lines - and now you are probably wondering one thing:
How much does laptop screen repair cost in the UK, and is it even worth fixing?
The answer depends on your laptop model, screen type, and damage level. A standard laptop screen repair or replacement in the UK usually costs around £50 to £300, while touchscreens, OLED displays, gaming laptops, and MacBooks can cost more.
This