

How to Uninstall Apps on Mac: Every Method Explained

Whether your storage is filling up, you're troubleshooting a glitchy app, or you're simply doing a digital spring clean, knowing how to uninstall apps on Mac properly makes a real difference. There's more to it than dragging things to the Bin. This guide covers every method, from the quickest drag-and-drop to deep-cleaning leftover files.
What Happens When You Simply Drag an App to the Bin?
It's tempting to think that moving an app to the Bin is a complete uninstall. Unfortunately, that's only part of the story.
When you install most apps on a Mac, macOS and the app itself may create supporting files in several different locations across your system. These can include preference files, cache data, application support folders, login items, and extensions.
When you drag the app itself to the Bin, many of those supporting files stay put. Over time, they can quietly pile up and waste storage space, which is especially noticeable on Macs with limited SSD capacity.
Method 1: How to Delete Apps on Mac Using Finder (The Quickest Way)
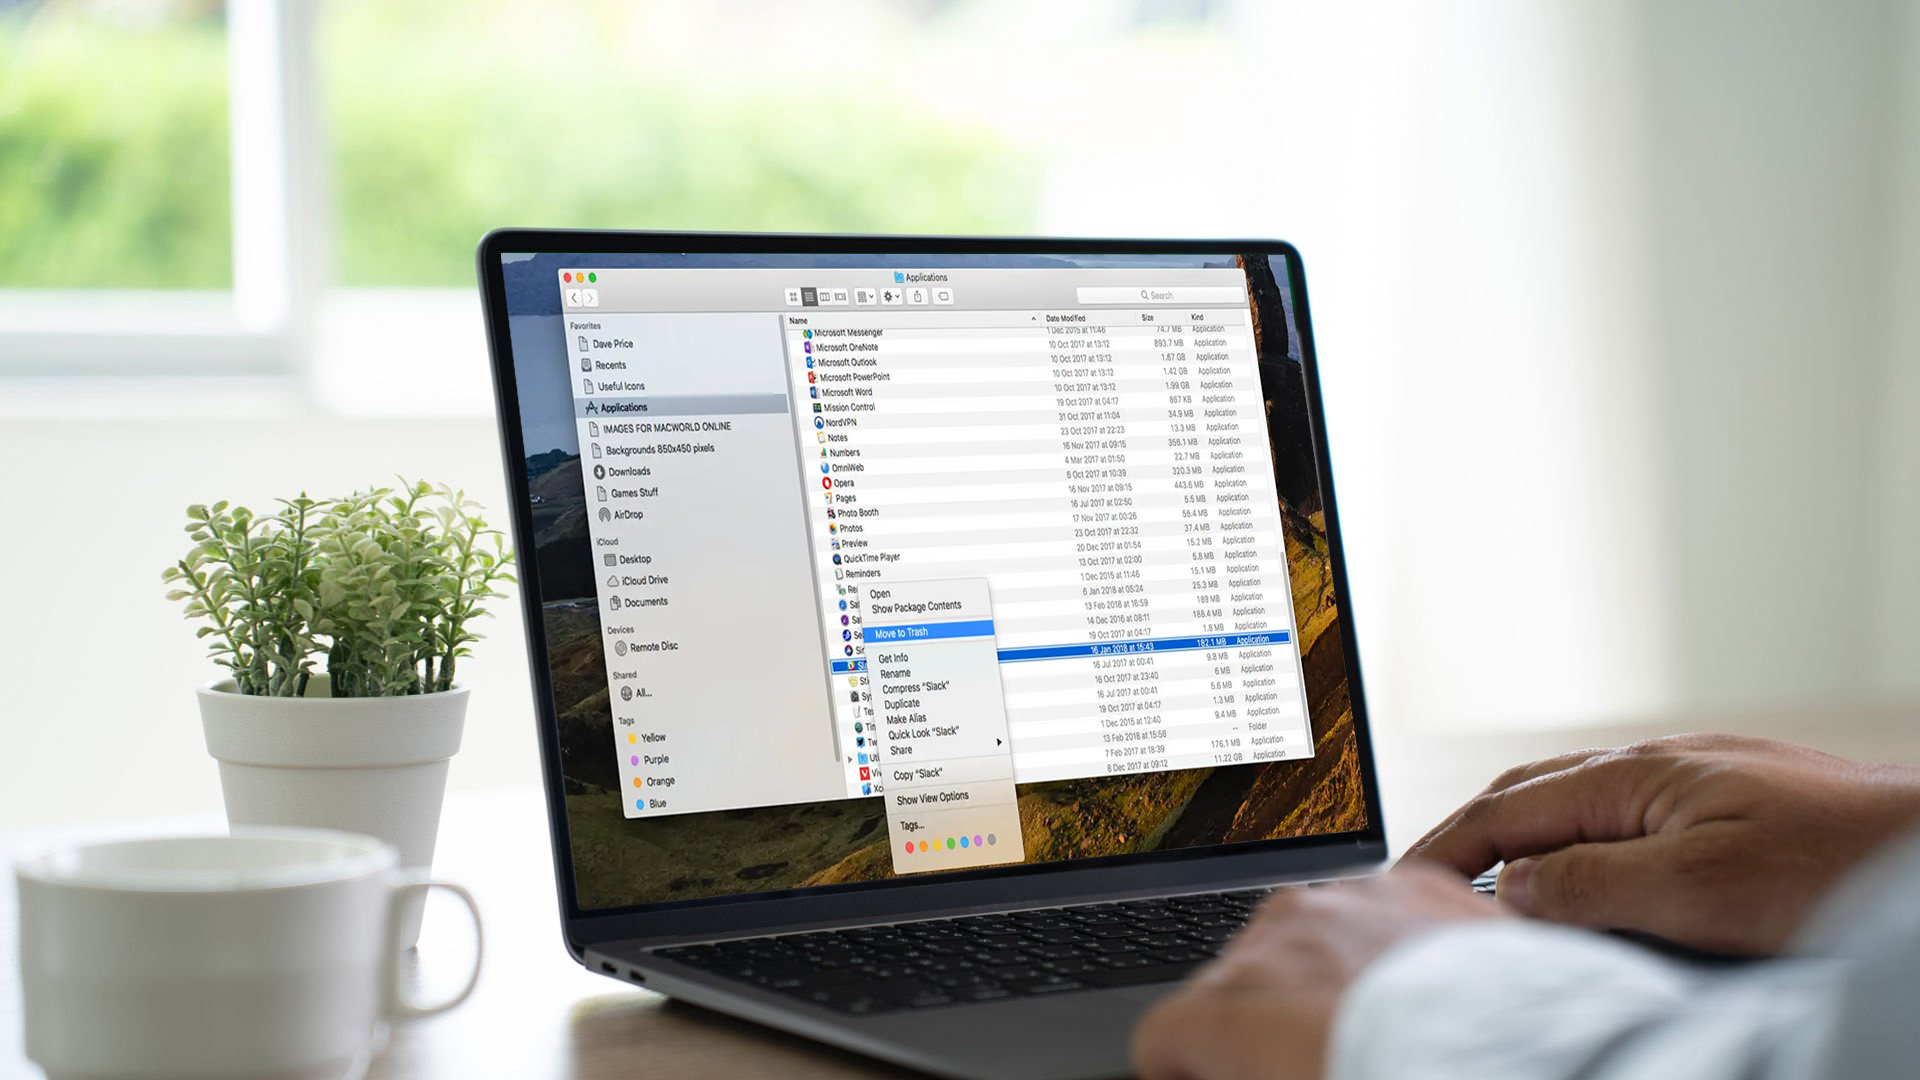
This is the fastest method and works for most third-party apps, whether downloaded from the App Store or elsewhere.
Steps:
- Open Finder
- Click Applications in the left sidebar
- Find the app you want to remove
- Right-click on it and select Move to Bin, OR drag it directly to the Bin in your Dock
- Right-click the Bin and select Empty Bin to permanently delete it
Keyboard shortcut: Select the app and press Command (⌘) + Delete to move it to the Bin instantly.
Worth knowing: This method removes the main app bundle but leaves behind supporting files. For apps you don't plan to reinstall, use one of the deeper methods below.
Method 2: How to Remove App Store Apps on Mac
For apps you purchased with your Apple Account, Apple documents an uninstall method directly from the Apps icon in the Dock.
Steps:
- Click the Apps icon in the Dock
- Click and hold the app you want to delete until it starts to jiggle
- Click the delete button on the app
- Confirm if prompted
This method is specifically for App Store purchases tied to your Apple Account.
Important: Deleting or uninstalling an app does not delete documents or other files you created with that app, and it does not cancel subscriptions you bought through the app.
Method 3: Use System Settings to Find Large Apps Before Removing Them
System Settings gives you a handy overview of how much storage your apps are using. It's especially useful when you want to free up space and see which apps are worth removing first.
Steps:
- Click the Apple logo in the top-left corner
- Go to System Settings
- Select General, then Storage
- Review the Applications category
- Use this view to spot large or unused apps before removing them via Finder or the App Store method above
On macOS Ventura 13 or later, Apple says the Storage view in System Settings shows how space is being used and can provide more information and management options for categories such as Applications. If you're constantly running short on storage, this view can also help you decide whether a tidy-up is enough or whether it's time to browse affordable laptops with more room to grow.
Method 4: Use the Developer's Own Uninstaller
Some applications, particularly larger software suites, come with a dedicated uninstaller. This is often the most thorough removal method available because the developer knows exactly which files their software created.
Common apps that include their own uninstaller or removal tool:
|
App |
How to Uninstall |
|
Adobe Creative Cloud |
Use the Creative Cloud desktop app to uninstall individual Creative Cloud apps, or Adobe's official uninstaller for the Creative Cloud desktop app when needed |
|
Microsoft Office |
Remove the apps from Applications, then follow Microsoft's support steps to delete related files from ~/Library/Containers and Group Containers |
|
Antivirus or Security Suites |
Check the developer's support site for a dedicated removal tool or uninstaller |
|
VPN Apps |
Check the app's own settings or support pages, as some VPNs include their own uninstall steps |
If you're not sure whether an app has its own uninstaller, check the original download folder or the developer's support pages.
If your Mac regularly struggles with large work apps, that can also be a useful point to compare the best business laptops designed for heavier everyday office workloads.
Method 5: How to Uninstall Apps on Mac Using Terminal (Advanced)
This method is for confident users comfortable with the command line. It lets you delete programme in Mac directly and is useful when apps won't move to the Bin using other methods.
Steps:
- Open Terminal (find it via Spotlight by pressing Command + Space and typing "Terminal")
- Quit the app first, then type the following command, replacing AppName with the exact app name:
- sudo rm -rf /Applications/AppName.app
- Press Return and enter your administrator password when prompted
Warning: Only use Terminal if you are completely sure of the app name and path. Deleting the wrong file can cause serious issues, so double-check everything before you press Return.
Method 6: How to Remove Leftover Files Manually After Uninstalling
Even after deleting an app, residual files often remain scattered across your Library folder. Here's how to find and remove them manually.
Steps:
- Open Finder
- From the menu bar, click Go > Go to Folder
- Type ~/Library and press Return
- Look inside the following folders for files related to the uninstalled app:
|
Folder |
What It Contains |
|
Application Support |
App data and saved files |
|
Preferences |
App settings (.plist files) |
|
Caches |
Temporary app data |
|
Containers |
Sandboxed app data (App Store apps) |
|
Saved Application State |
App window/state history |
|
Logs |
App activity logs |
5. Delete any folders or files that match the app or developer name
6. Empty the Bin
Tip: Use Command + F in Finder to search "This Mac" for the app name to catch any stray files you might have missed. Advanced users may also find some system-wide support files in /Library, but be extra careful there, as those files can affect every user on the Mac.
Method 7: Use a Third-Party Uninstaller for a Complete Clean
If you want the easiest and most thorough approach to how to remove an app on a MacBook, a third-party uninstaller is hard to beat. These tools scan for and delete all related files automatically.
AppCleaner (Free)
The most widely recommended free Mac uninstaller. Drag any app into the AppCleaner window and it instantly finds all related files. The SmartDelete feature monitors your Bin in the background, so it automatically catches leftover files whenever you drag an app to the Bin.
CleanMyMac (Paid)
A full system optimiser with a dedicated app uninstaller. It also handles junk cleaning, malware scanning, and performance monitoring. A solid choice if you want an all-in-one tool.
Pearcleaner (Free, Open Source)
A newer open-source option that's been gaining traction. Lightweight, privacy-focused, and very effective at tracking down leftover files.
Recommendation: For most users, AppCleaner is all you need. It's free, lightweight, and fully compatible with macOS Tahoe.
How Do You Delete an App from MacBook That Won't Delete?
Sometimes an app refuses to move to the Bin, often because it's still running in the background. Here's how to fix that.
Step 1: Force Quit the App
- Press Command + Option + Escape
- Select the app from the list
- Click Force Quit
Step 2: Check for Background Processes
- Open Activity Monitor (find it via Spotlight)
- Search for the app name
- Select it and click the X button to quit the process
- Then try deleting the app again
Step 3: Check Login Items
Some apps add themselves to your Mac's startup list. Go to System Settings > General > Login Items & Extensions and remove any entries related to the app before deleting it.
Step 4: Try Deleting via Terminal
If all else fails, use the Terminal method described above (Method 5) with sudo to override permission restrictions.
Which Apps Can You NOT Delete on a Mac?

Not every app on your Mac can be removed. macOS includes several system apps that are protected by System Integrity Protection (SIP) and cannot be deleted, even by administrators.
Apps you cannot delete include:
- Safari
- Finder
- App Store
- System Preferences / System Settings
- Messages, FaceTime, Mail (on recent macOS versions)
However, there are some Apple apps that can be deleted if you choose. You can remove GarageBand, Pages, Numbers, and Keynote via the App Store if you don't use them and want to free up space.

Ready to Clean Up?
Knowing how to uninstall apps on Mac goes beyond dragging to the Bin. Whether you're using the Apps icon in the Dock, Finder, a developer's uninstaller, or a tool like AppCleaner, taking a few extra steps means a cleaner Mac with more usable storage.
If repeated clean-ups are a sign that your Mac is constantly running out of room, it may be time to think beyond uninstalling apps and look at a hardware upgrade instead. Whether you're comparing laptops for students for everyday coursework and portability or exploring the best laptops for AI applications for heavier creative, coding, or model-based workloads, paying attention to storage, memory, and long-term usability will make a real difference.
And if you want to stay within the Apple ecosystem, it may also be worth comparing the storage and performance options across the latest Apple laptops before you decide on your next machine.
Read our MacBook guide for expert tips, troubleshooting, and a full comparison of the newest MacBook models, including the Neo, Air, and Pro.

The "Need to Know" Essentials...
How do you delete an app from MacBook that won't go to the Bin?
Force quit the app via Command + Option + Escape, then try moving it to the Bin again. If it still won't delete, use Terminal with sudo rm -rf.
Does dragging an app to the Bin fully uninstall it on a Mac?
No. Dragging to the Bin removes the main app file but leaves behind preference files, caches, and support data in your Library folder.
How do I remove all traces of an app on Mac?
Use AppCleaner (free) or CleanMyMac to find and delete all associated files. Alternatively, manually check ~/Library/Application Support, Preferences, and Caches folders.
Can I delete built-in Mac apps like Safari or Mail?
Not usually. Apple says apps that are part of macOS, such as Safari and Mail, can't be uninstalled.
How do I uninstall Adobe apps on Mac?
Use the Adobe Creative Cloud desktop app. Select the app you want to remove, click the three-dot menu, and select Uninstall. This ensures a complete removal.
How do I free up space by removing apps on Mac?
Go to System Settings > General > Storage > Applications. This shows all installed apps sorted by size, making it easy to spot large unused programmes and delete them.
How do I uninstall Microsoft 365 or Office on a Mac?
Remove the Office apps from Applications, then follow Microsoft's official steps to remove related files from your user Library folders.
How do you remove App Store apps in macOS Tahoe?
Use the Apps icon in the Dock, click and hold the app until it jiggles, then click the delete button. Finder is still the fallback method for many apps.
How to delete a Safari web app on Mac
Safari web apps are saved to the Applications folder in your Home folder, not the main Applications folder for the whole Mac. To remove one, open Finder, choose Go > Home, open Applications, then drag the web app to the Bin.
Is it safe to delete files from the Mac Library folder?
It's generally safe if you only delete files that match the name of the app you've uninstalled. Be cautious and avoid deleting anything you don't recognise, as some Library files are system-critical.
| Read More: |
| How to Force Quit on Mac: A Step-by-Step Guid |
| MacBook Not Turning On or Charging? Here’s How to Fix It |
| MacBook Battery Problems: When to Repair or Replace |
Related Articles
Last Updated: March 09, 2026
Apple has done something surprising. In March 2026, the company unveiled its most affordable laptop ever: the MacBook Neo.
Starting at just £599, it brings the full Mac experience to a much wider audience: students, first-time buyers, and budget-conscious shoppers who have long been priced out of the Apple ecosystem.
This is not just a stripped-down machine. The MacBook Neo features a beautiful aluminium design, a sharp Liquid Retina display, the A18 Pro chip, and up to 16 hours of battery life. In short, it packs a serious punch for its price.
So, what exactly makes this laptop worth your attention? Let us walk through every key MacBook Neo feature in detail.
MacBook Neo: Full Specs at a Glance
Before diving deep, here is a quick overview of everything the MacBook Neo brings to the table.
| Specification | Details |
| Processor | Apple A18 Pro (6-core CPU, 5-core GPU, 16-core Neural Engine) |
| Display | 13-inch Liquid Retina, 2408 x 1506 resolution, 500 nits |
| Memory | 8GB unified memory |

Last Updated: March 09, 2026
Apple’s MacBook Pro lineup has consistently defined what professional laptops can do, but the introduction of the M5 generation pushes the category even further. Powered by Apple’s latest silicon architecture and backed by upgrades in storage, connectivity, and AI performance, the MacBook Pro M5 is designed to handle modern workflows, from video production and software development to AI experimentation and heavy multitasking.
While the external design remains familiar, the real upgrades are under the hood. Apple has focused heavily on improving computational power, on-device AI processing, wireless capabilities, and storage performance. These changes make the MacBook Pro M5 one of the most capable laptops available for professionals and power users.
Below are the top seven MacBook Pro M5 features that stand out in the latest generation.
1. Next-Generation Apple Silicon: M5 Pro and M5 Max Chips
The biggest upgrade in the MacBook Pro M5 lineup is the introduction of Apple’s M5 Pro and M5
Last Updated: March 09, 2026
If you’ve been thinking about buying a MacBook Air this year, you’ve probably run into the same question everyone in the UK tech community is asking:
Should you buy the new MacBook Air M5 or save money with the M4?
At first glance, the two laptops look almost identical. Same ultra-thin aluminium design. Same beautiful display. Same lightweight build that makes the MacBook Air perfect for working in cafés, trains, or university libraries.
But once you dig a little deeper, the MacBook Air M5 vs M4 comparison starts to reveal some interesting differences.
Apple hasn’t completely reinvented the MacBook Air in 2026, but the company has quietly improved several areas including performance, storage, wireless connectivity, and AI features.
So, if you're planning to buy an Apple MacBook from UK, Laptop Outlet or Amazon, this guide will help you decide which model actually makes more sense.
Let’s break it down.
MacBook Air M5 vs M4: Quick Comparison
Before diving into details, here’s a quick overview
Last Updated: March 09, 2026
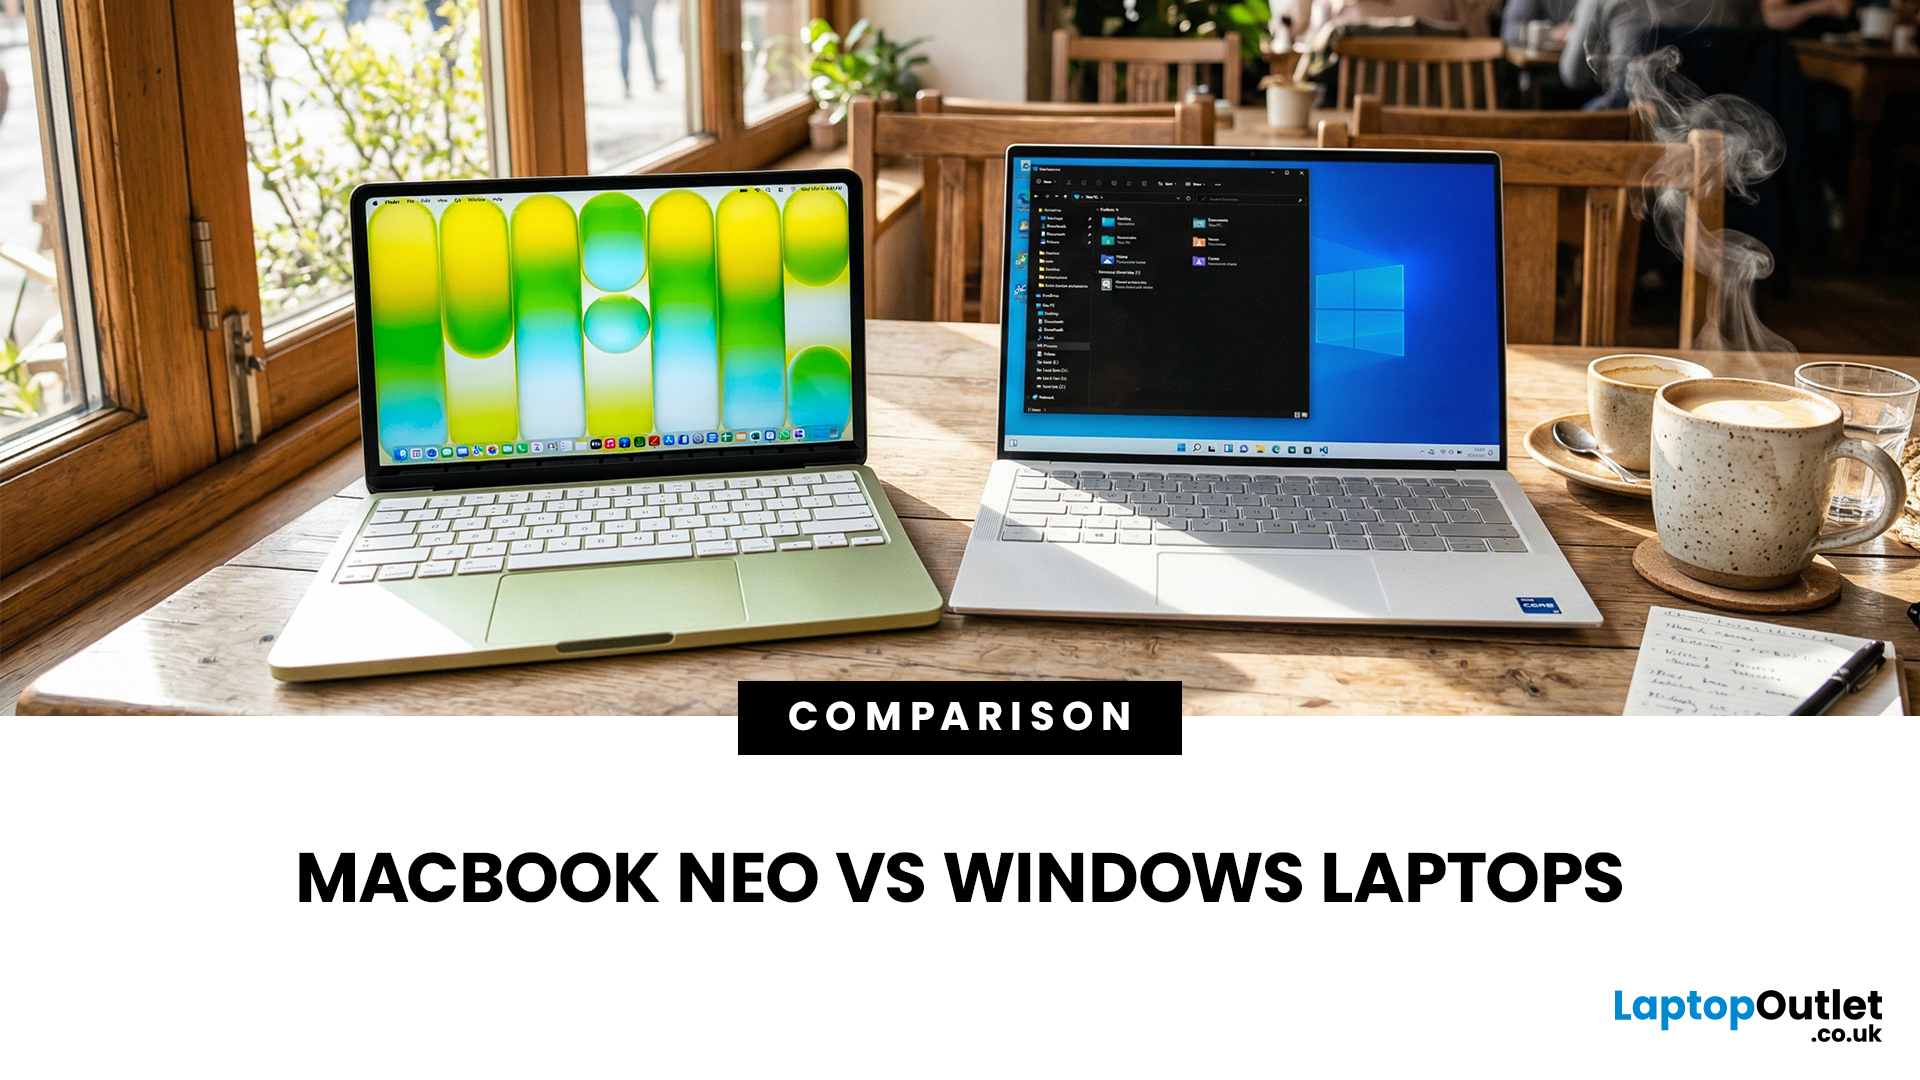
If you are comparing MacBook Neo vs Windows laptops, you are really asking one question: should you buy Apple’s cheapest Mac, or get a budget Windows laptop with more ports and more choice?
MacBook Neo is new, starts at £599, and is designed to be a simple, premium-feeling everyday laptop with macOS, long battery life, and strong call quality.
Budget Windows laptops can offer more screen sizes, more ports, and sometimes better upgrade options. But quality is inconsistent in this price range, and that’s where Neo tries to win.
Below is the practical, buyer-focused breakdown.
10-Second Answer Box
Choose MacBook Neo if
- You want the cleanest everyday experience for browsing, school, docs, and calls
- You value build quality and trackpad feel
- You want a laptop that stays fast and quiet for years, without tweaking settings
Choose a budget Windows laptop if
- You want more ports like HDMI and USB-A built in
- You need a bigger screen for the money
- You want the flexibility of Windows software and lots

Last Updated: March 09, 2026
Apple made a bold move on 4 March 2026. It introduced the MacBook Neo — a laptop that starts at just £599 and runs on a chip that, until now, only lived inside iPhones.
That chip is the A18 Pro. And its arrival in a Mac laptop raises a very obvious question: what does it actually mean for performance?
The answer is more interesting than you might expect. This article breaks it all down — the architecture, the real-world gains, the trade-offs, and who this machine is really built for.
What Is the A18 Pro Chip?
The A18 Pro is not a new chip. It first appeared in the iPhone 16 Pro in late 2024. But placing it inside a laptop is entirely new territory for Apple.
This is the first time Apple has ever used a mobile-class chip to power a Mac. That alone makes the A18 Pro MacBook Neo a significant moment in computing history.
The Core Architecture
Here is what sits inside the A18 Pro:
- 6-core CPU — 2 performance cores and 4 efficiency cores
- 5-core GPU — hardware-accelerated ray tracing included

Last Updated: April 28, 2026
Apple’s Studio Display and Pro Display XDR are among the most advanced monitors available for professionals. With ultra-sharp 5K and 6K resolutions, these displays are designed for creatives who need exceptional colour accuracy, brightness, and detail.
However, to get the best experience, you need a powerful MacBook with strong graphics performance and Thunderbolt connectivity. Apple’s latest MacBooks powered by M3, M4, M5, M5 Pro, and M5 Max chips bring major improvements in performance, AI capabilities, and external display support.
Can MacBooks Support the Studio Display or Pro Display XDR?
Yes. Most modern Apple Silicon MacBooks can connect to these displays.
Studio Display
- Resolution: 5K (5120 × 2880)
- Thunderbolt / USB-C connection
- Works with most Apple Silicon Macs
Pro Display XDR
- Resolution: 6K (6016 × 3384)
- Requires high bandwidth Thunderbolt connection
- Best paired with MacBook Pro models
Modern MacBooks with Thunderbolt ports and Apple Silicon chips can drive high-resolution

Published: March 12, 2026
Apple’s new MacBook Air M5 is officially here, and after spending time testing it myself, I can confidently say one thing: it’s fast. Like, open-all-my-tabs, edit-4K, switch-between-apps-without-thinking fast. But benchmarks and real use aren’t always the same thing. So, I ran several tests, used it for everyday work, and compared it with previous Air models to answer the real question: Are the MacBook Air M5 benchmarks strong enough to justify the upgrade?
For UK buyers in particular, this is shaping up to be one of the easiest MacBooks to recommend in 2026. Apple kept the thin, fanless design that people already love, but added the new M5 chip, improved base storage, faster wireless connectivity, and stronger performance across both benchmarks and daily workflows. Let’s break down the numbers and the real-world experience.
MacBook Air M5 Overview
Like iPhone 17e, iPad Air M4, and MacBook M5 Pro and M5 Max, Apple announced the MacBook Air M5 on 3 March 2026, with availability beginning

Published: March 12, 2026
If you have an old Valve Steam Machine tucked away under the telly or on a shelf, you might be wondering whether it can still do more than launch games. The good news is that, with the right setup, it can absolutely pull double duty as a compact desktop computer for everyday use.
This guide walks you through a practical Valve Steam Machine setup for desktop use, from connecting a monitor and peripherals to accessing SteamOS desktop mode and making the system feels more like a standard PC. Whether you want a lightweight machine for web browsing, media streaming, or casual home computing, repurposing a Steam Machine can be a clever and cost-effective option.
What is a Valve Steam Machine?
A Valve Steam Machine was originally designed as a living-room gaming PC. It brought PC gaming closer to the console experience, usually running SteamOS and focusing on controller-friendly play from the sofa.
That said, the hardware inside many Steam Machines is still capable of handling basic desktop

Published: March 13, 2026
If you have just bought Studio Display XDR and want to use it with a MacBook Pro, the setup is usually quick. In most cases, the screen should come on automatically within a few seconds. macOS should recognise the display without extra drivers or manual installation. According to Apple’s official Mac support documentation, compatible MacBook Pro models automatically detect Studio Display when connected through Thunderbolt. Studio Display XDR can also deliver up to 140W of host charging through that same cable, so your MacBook Pro can charge while connected.
This Studio Display XDR setup guide explains the full process for connecting the Apple Studio Display XDR to a MacBook Pro, from the initial cable connection to the display settings you may need to adjust afterwards. Studio Display XDR is not just another external monitor. It is a 27-inch 5K Retina XDR display with mini-LED backlighting, up to 2,000 nits peak HDR brightness, a 120Hz refresh rate with Adaptive Sync, built-in camera and

Published: March 13, 2026
Apple is entering a new era of product strategy. For years, the company has dominated the premium tech market with devices like the iPhone Pro and MacBook Pro. But now Apple appears to be expanding its ecosystem in two directions at once: more affordable devices and ultra-premium hardware.
The recent MacBook Neo release indicates that Apple has a budget-friendly laptop to attract students and first-time Mac users. At the same time, industry reports indicate Apple is building a lineup of Ultra devices that will sit above its current Pro models.
This shift highlights what many analysts now call the Apple Ultra strategy, a long-term plan to stretch Apple’s ecosystem from entry-level devices all the way to cutting-edge luxury hardware. From the MacBook Neo at the affordable end to devices like iPhone Ultra, MacBook Ultra, and AirPods Ultra, Apple’s premium device roadmap is becoming more ambitious than ever.
MacBook Neo: Apple’s New Entry-Level Laptop
The MacBook Neo is expected to become